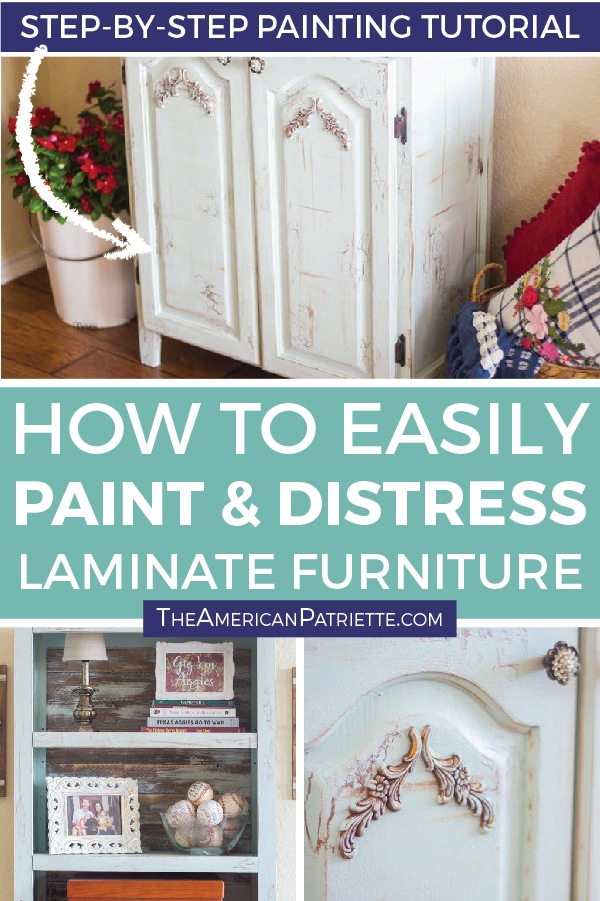
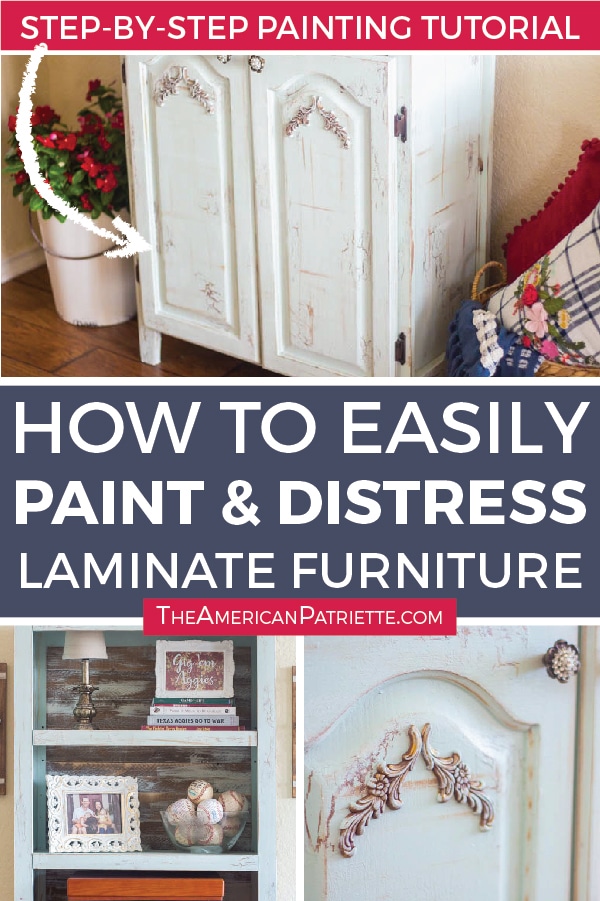
How to paint and distress a laminate bookshelf (without priming!)
This is the best step by step tutorial for how to paint and distress a laminate bookshelf without sanding and without priming.
The makeover is gorgeous – you get a beautiful piece of furniture with a rustic finish!
If you’re wanting to give some character to a cheap ‘ole piece of laminate furniture and give it a vintage look, I’ve got a super fun step-by-step tutorial for you on how to do an amazing furniture makeover. I can’t wait to share it – this is definitely my favorite way to refinish a piece of furniture nowadays!
I used this super easy (and so fun!!) technique a few years ago when I redid a little laminate kitchen island we have. There are a lot of skeptics out there who think you can’t paint laminate furniture, but I think because this particular technique is supposed to make the piece look old, chippy, and imperfect, there’s a lot more room for imperfections in the painting.
About 5 years ago, I remember standing in the line at Lowe’s to get my paint color mixed for my first piece of laminate. I was talking to a gentleman in line about what projects we were working on, and he assured me I wouldn’t be able to properly paint a cheap laminate piece.
Well, I am so thrilled to say…he was totally wrong!
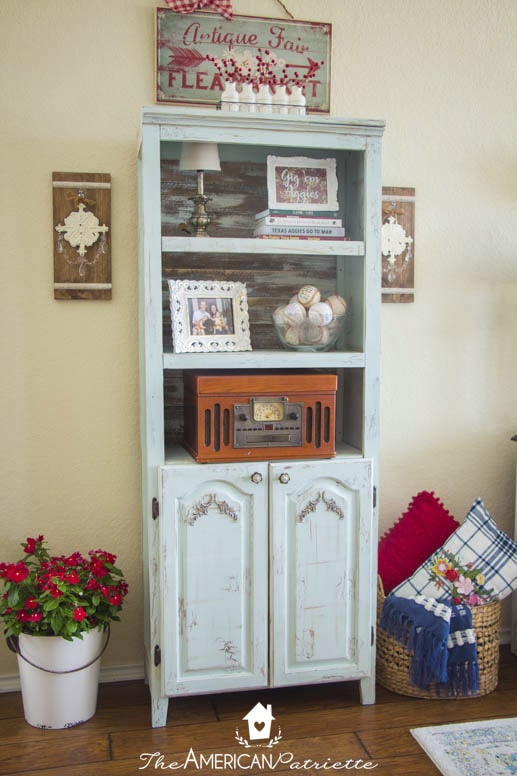
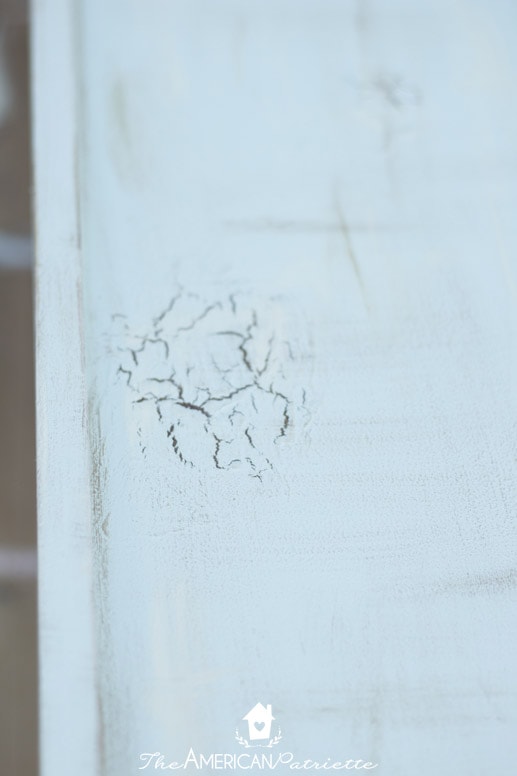
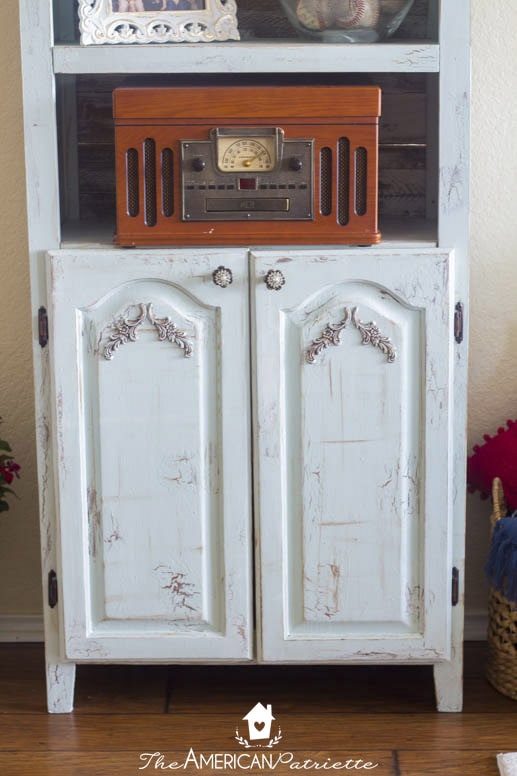
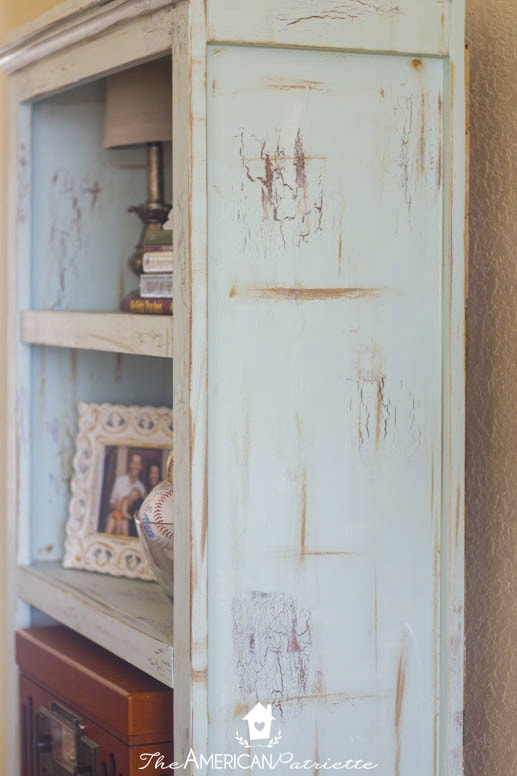
Just look at that gorgeous chippy and crackle look! Ah! I just love it!!

I’m going to show you how to get that gorgeous crackle (you’re not going to believe how!) and the distressed look, as well as offer some tips as to how you can easily add some finishing touches that really help dress up the piece.
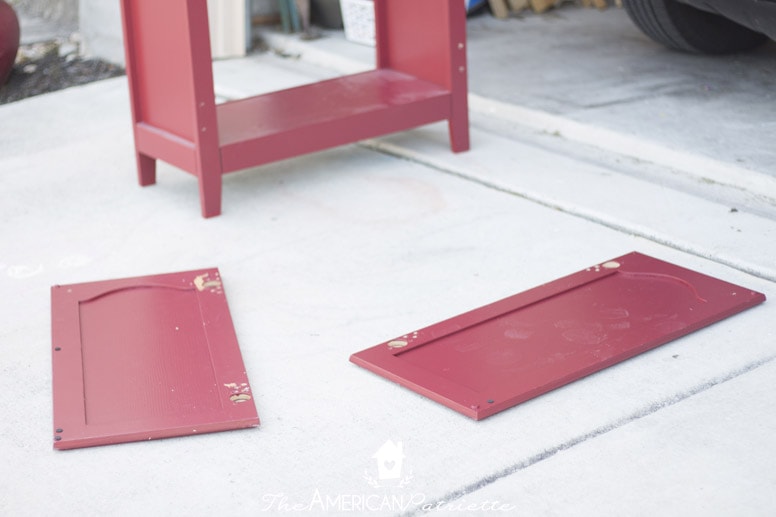
Before we get started, let’s take a quick look at what this bookshelf was like before it got its makeover.
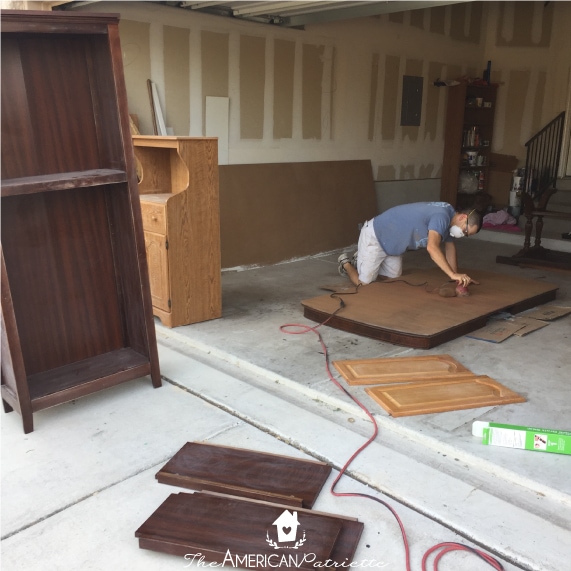
We got it at Goodwill for $25 when I was about 8.5 months pregnant. Planning DIY projects when you’re about to have another baby is always a good idea. 🙂
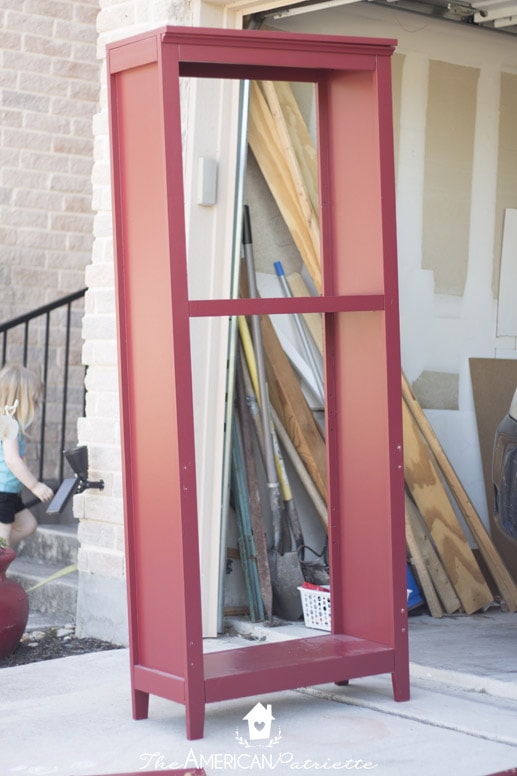
A few months later, I got to work painting it. I finally decided I wanted to paint it cherry red, just like our front door.
Three different shades of red (and three different coats of paint) later, I finally settled on this, but I just did NOT like it. It kept me awake at night to think about this sad looking bookshelf that originally had far more character in my head than in real life, so, I did what I do best…

I insisted it get another paint job. But, this time I knew it needed a dramatic makeover, so I decided to follow the same painting/distressing technique I used when I painted our kitchen island and give it that vintage chippy look we all love so much.
I can finally sleep at night. Look at this beautiful thing!
This post contains affiliate links for your convenience. You can read my full disclosure policy here.
Ready to get started?!
Materials You Need:
To Paint the Furniture
- Sandpaper (medium grit – about 120), or make the job way easier with an orbital sander + medium grit (about 120) sanding discs (see note on Step 1 about sanding)
- Quart of latex paint (I used Valspar Signature from Lowe’s)
- 2″ Paintbrush for painting the color of the furniture (angled might be best depending on how many grooves you have)
- Foam rollers (get two in case you wear the first one out) – get ones that say they’re for cabinet and doors.
- Paint tray
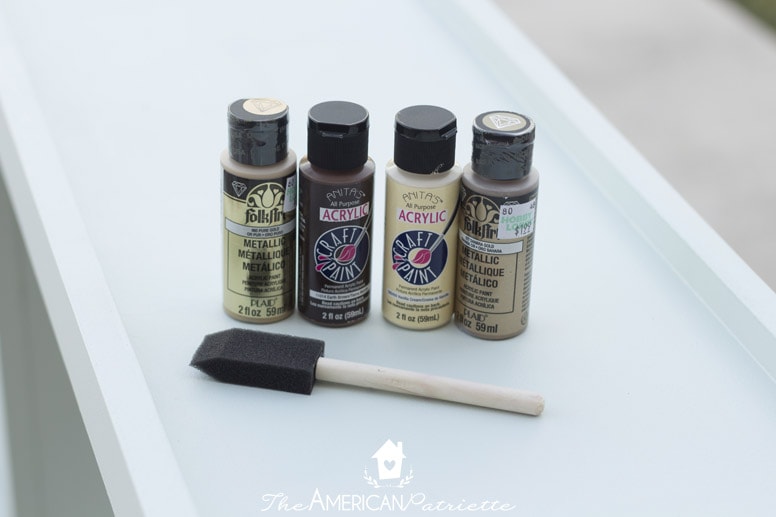
- Acrylic paint (the colors you want for distressing – I used dark brown, cream, and gold)
- Foam paintbrushes (at least 2-3)
- Old paint brush for distressing
- At least one bottle of Elmer’s glue (I can’t speak for other brands – I’ve only used Elmer’s when I’ve distressed laminate furniture, so that’s what I’d stick with!)
To Do the Wood Plank Backing (if you’re doing this part)
- Wood planks (enough to fit the back of the furniture – this is what we used)
- A wood saw to cut the planks the width of the furniture
- Wood glue
- Wood stain (the small 8oz container was enough for my project)
- Old rag for staining
- Old paint brush for distressing
- Cream-colored acrylic paint for distressing
- Orbital sander with low grit (60-80) hook & loop sandpaper discs
- Nail gun & air compressor (or you could try using liquid nails if you don’t have a nail gun)
To finish it off:
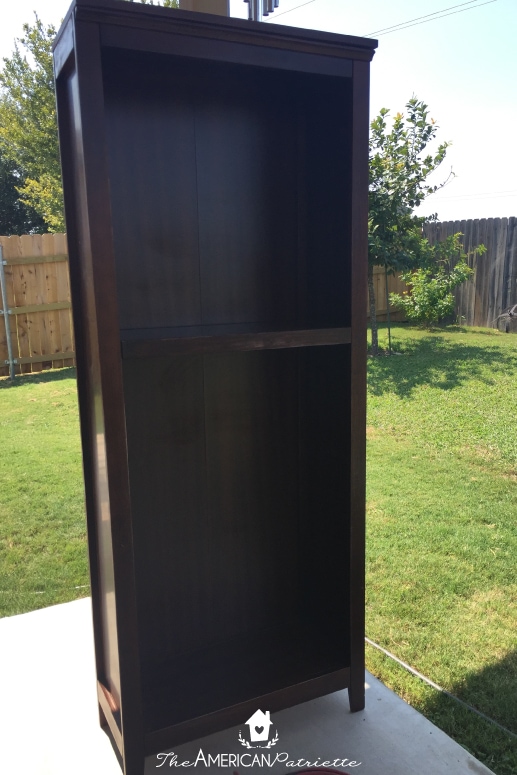
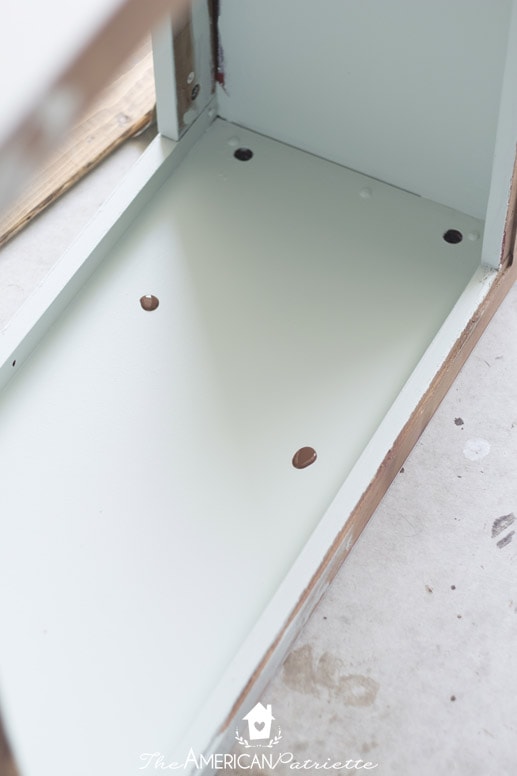
Step 1: Sand to remove paint OR lightly sand to roughen the surface
If you’re as crazy as I am and have a piece of laminate furniture you’ve painted three times and now want to finally redo it to where you actually like the finished product, then the first step we need to do is sand down all that paint. I absolutely recommend using an orbital sander for this process – it will make your life so much easier!
If you’re painting straight on the laminate (as in, the furniture doesn’t have a coat of paint on it in need of removal), then you don’t need to do as much sanding. I’d still recommend that orbital sander, but regular ‘ole medium grit (about 120) sandpaper will be fine. Just lightly sand the entire piece to roughen it up a bit – don’t spend too much time on that.
Stripping the red away:
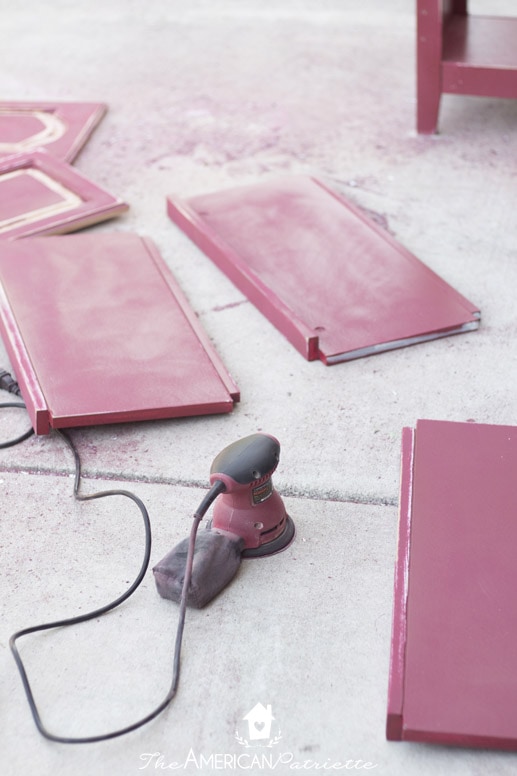
I definitely sanded this down fairly well because of the three coats of red paint that I had originally put on it, but it really doesn’t need this much sanding otherwise.
One of my cutie pies helping me!

Step 2: Wipe Down Furniture and Begin Painting
After you sand your piece, give it a good wipe-down with a damp rag, followed up by a dry one. Once you’ve wiped it all down, it’s ready for some paint! And yes, use the same quart of latex paint you’d use to paint a wall. Endless color options!
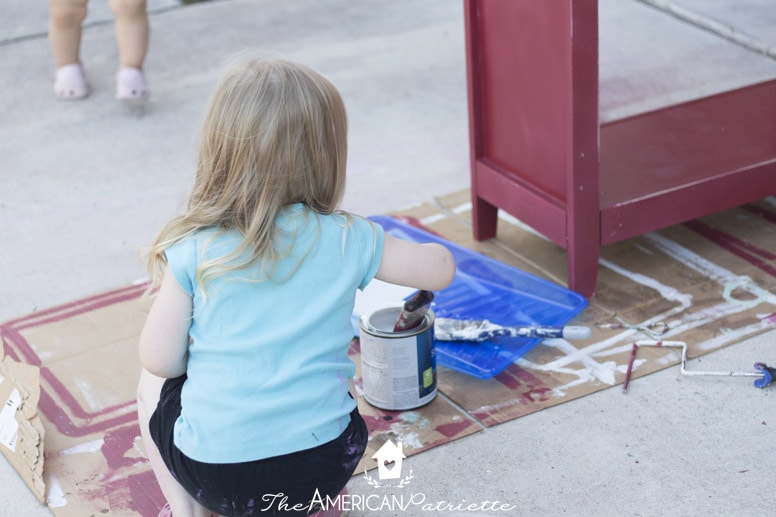
When you paint, you’ll first start out by using a paintbrush – probably an angled one – to paint in the crevices of one area of the bookshelf. You’ll immediately follow up with a foam roller. This will help give it a smooth, flawless finish. Just continue painting in sections until you finish coating the entire piece.
You’ll likely need to give it at least 2 coats – I think I did three for this bookcase. The great thing is, latex paint dries pretty quickly, so it didn’t take me long to give this thing a few coats. By the time I was finished with one coat, the part of the bookshelf where I started my painting was already dry enough, so I could just start right back over to do my second coat.
Again, just make sure you’re painting with a foam roller, following up over brush strokes and just being conscious of any paint drips, and you’ll get a great finish just like I did.
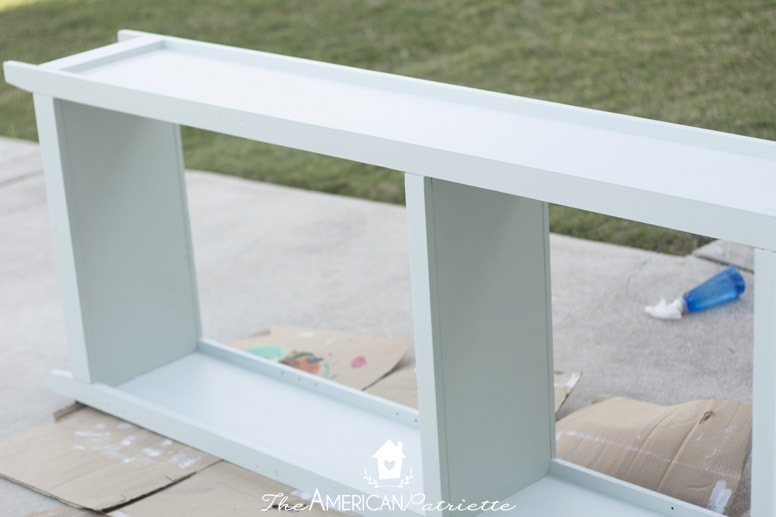
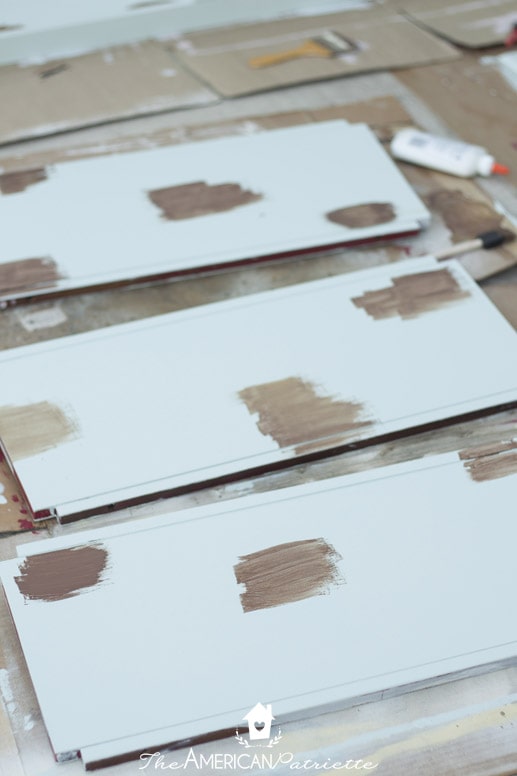
Step 3: Paint Spots with Acrylic Paint
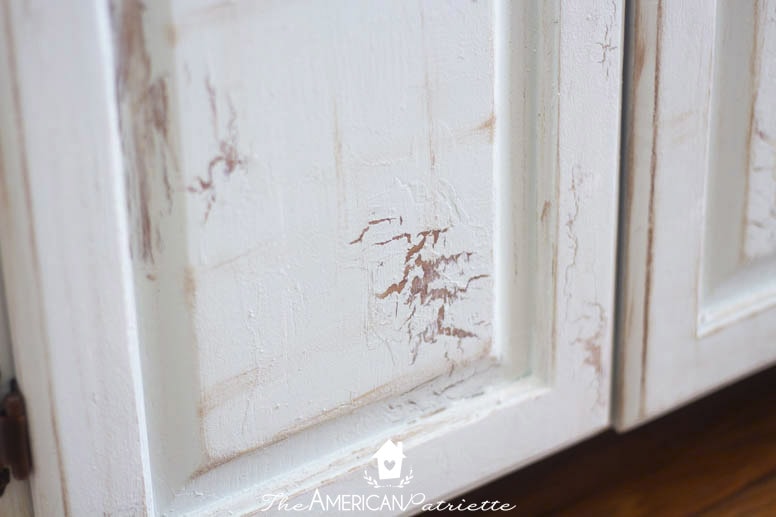
Now it’s time for the fun part! Once the paint is completely dry and you’ve finished the coats you need to give your furniture a thorough paint job, get your acrylic paints that you’re wanting to use for the distressing – these are the colors that you’ll want to show up in the crackles of the paint. As you can see, I chose brown, gold, and cream.
You’ll just start choosing some random areas on your furniture to drop some paint like this:
And then you’ll immediately start brushing it on with the foam paintbrush. You can see I made my paint marks in random shapes and just placed them throughout the bookshelf.
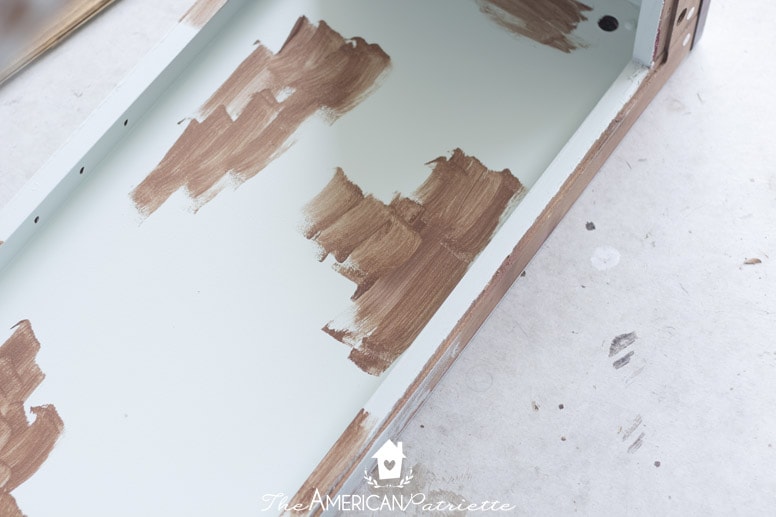
After painting the dark brown, I added some hints of gold and cream, as I wanted those colors to also pop through the crackled blue paint.

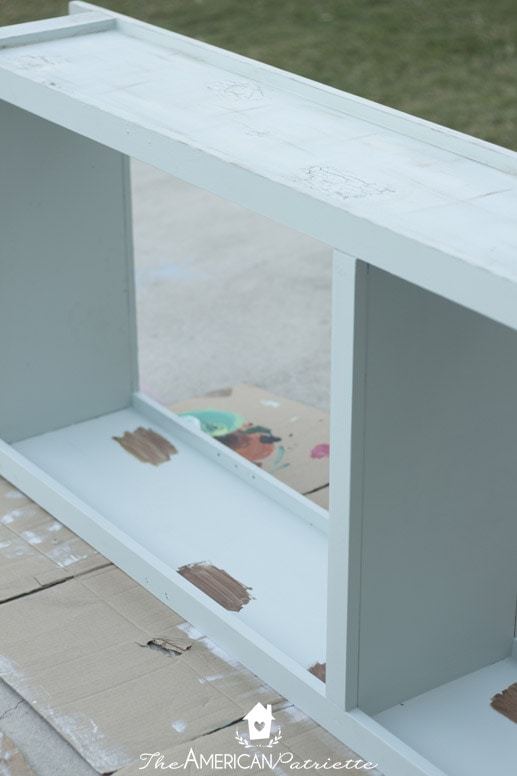
By the end of painting all the splotches, your furniture will look like a giraffe. That’s how you know you’re doing it right! 🙂
Let the acrylic paint completely dry before moving onto the next step. It dries really quickly, but you do want to make sure it’s 100% dry before you move on, or else the next steps won’t turn out as well.
Step 4: Spread the glue & paint over it to make the crackles
And now for the reaaaally fun part! Once all of the brown painted spots (or whatever color you chose for the spots) are completely dry, you can begin to start the crackling process.
Ok, let’s get cracklin’! This is how we do it: with Elmer’s Glue. So sophisticated, huh?
You’ll first squeeze a generous amount of glue onto each spot in one area of the furniture. You’ll work in batches on this part – you don’t want to do all of the glue on all of the spots at once unless your piece of furniture is pretty small, just because you don’t want the glue to dry too much before moving onto the next step.
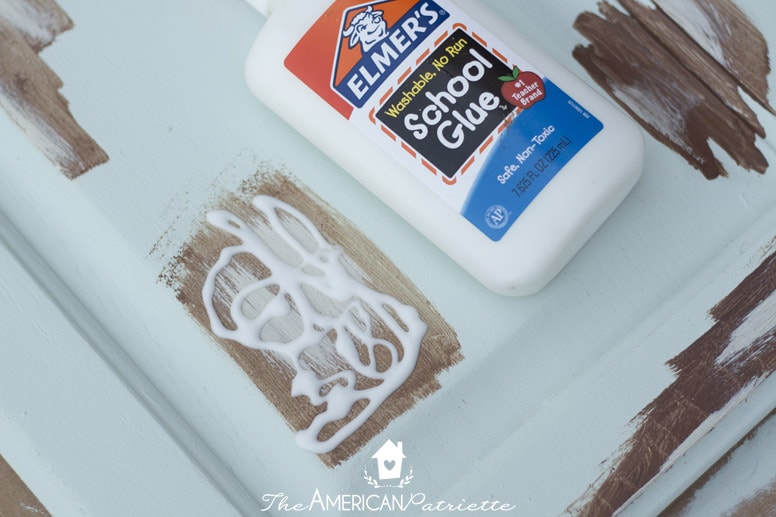
So, after you drizzle a good amount of glue onto your spot, you’re going to use a foam paint brush and spread it all over the spot. No need to be really precise on this step – just spread it enough so that it covers the spot.
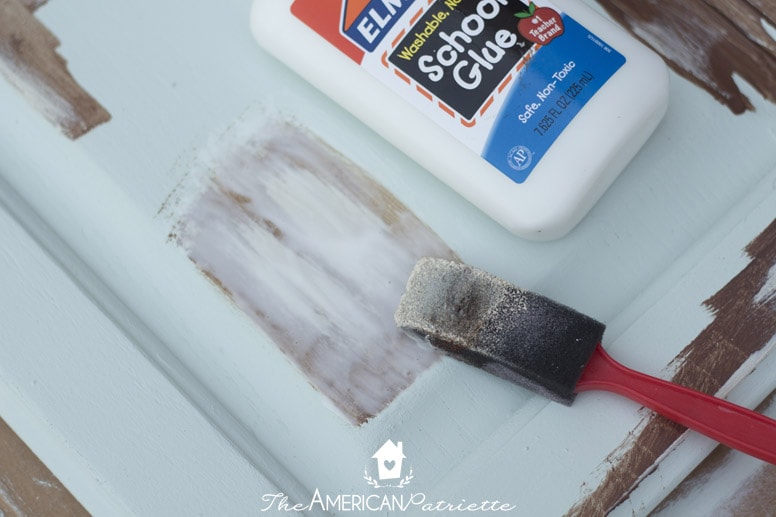
And do that same technique for all the spots in one area of the furniture. Let the glue sit for about 25 minutes (this is going to vary depending on your weather when you’re painting your shelf; when I painted this, it was probably about 85-90 degrees outside with a little bit of humidity). The bottom line is, you want the glue to have a little bit of “setting time” on the spots, but you do not want it to get dry. In order to get that pretty crackle, the glue still needs to be pretty tacky to the touch.
So, after you’ve given your glue about 25ish minutes to set, you’re going to get your foam roller (yes, the roller, NOT paint brush), liberally coat it with the main color you used for your furniture, and run it over the spots with the glue.
You want to completely coat it, and you’ll think it looks bad at first, but that’s ok. I promise, when it dries, it’ll look way better! After a minute or two of painting over the glue, you’ll notice the paint begin to crackle.
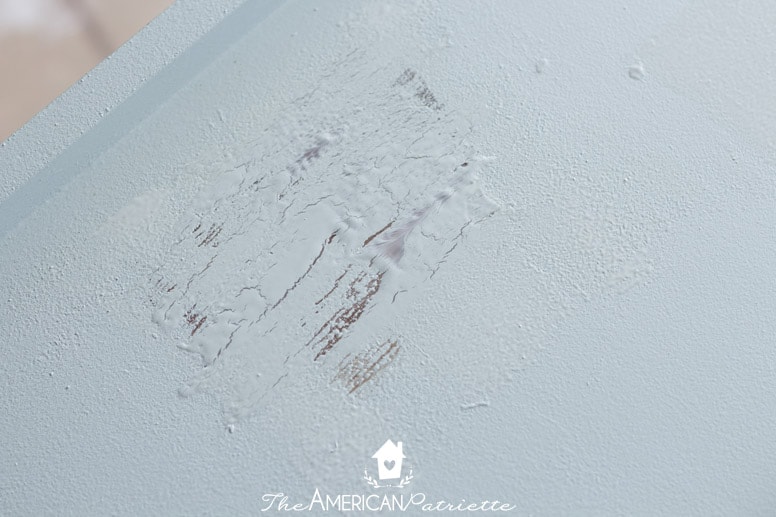
And it’ll just keep crackling!
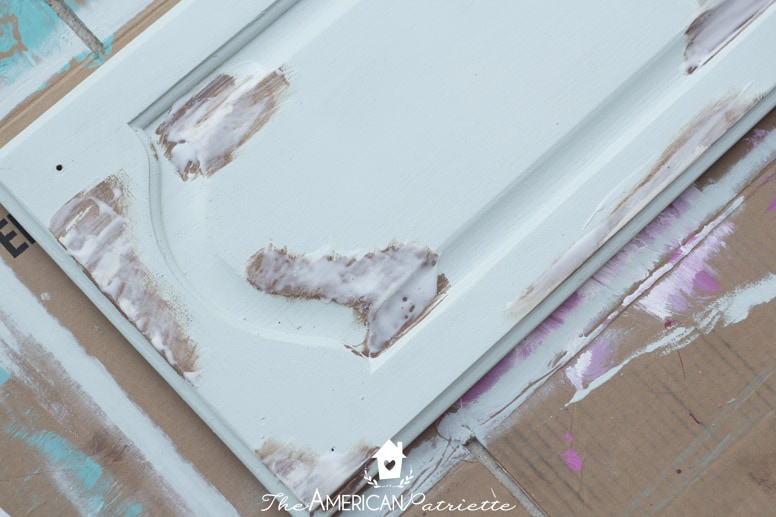
You’ll repeat that for all of the spots – glue first, let it set for a bit, and then run over each spot with a generous helping of the main color paint on the roller brush. Then, let the paint completely dry on your furniture before you begin giving it more of a distressed look with the acrylic paint.
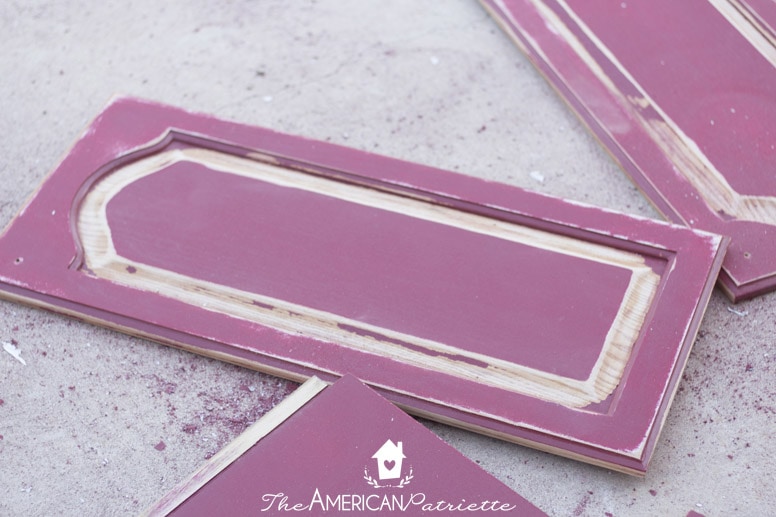
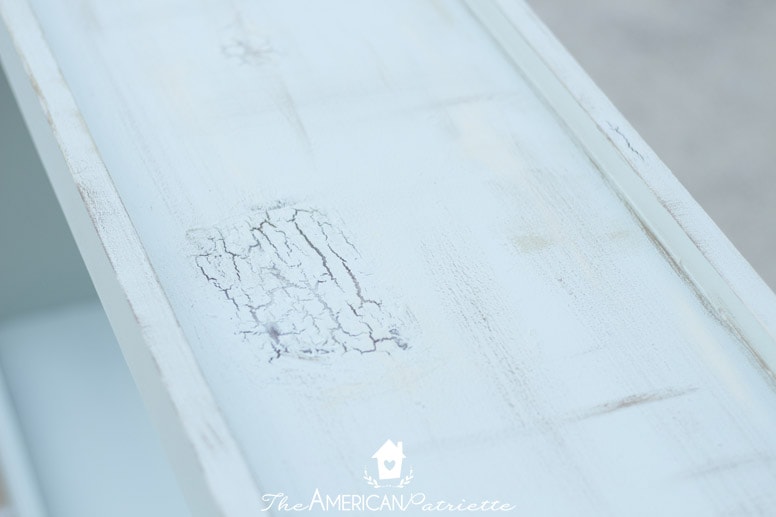
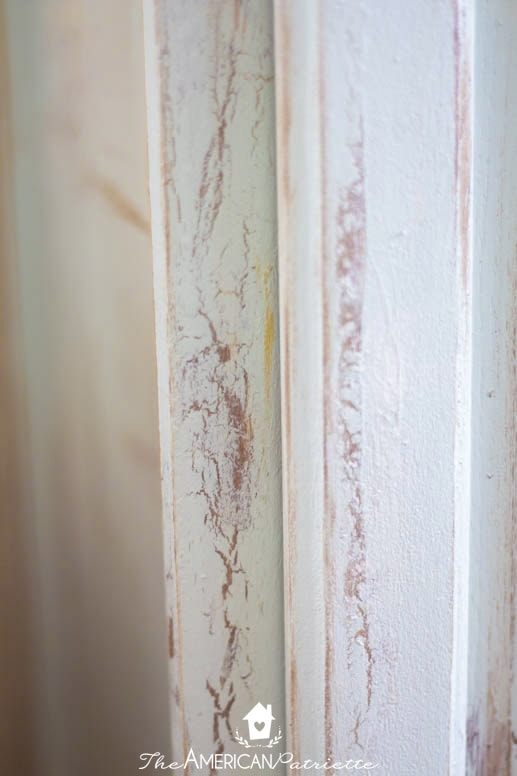
Step 5: Distress with by dry brushing
Once all of the paint/glue is completely dry on the furniture, squirt some of the acrylic paint you used for the crackles (or, if you didn’t use brown, gold, and cream for the crackles, you’ll probably want them here) onto a large piece of cardboard. You’ll gently dab an old paintbrush into the colors, wipe it off really well onto the cardboard (less is more when it comes to this process – you can always come back and add more paint later), and then begin gently running your paintbrush up and down on the furniture.
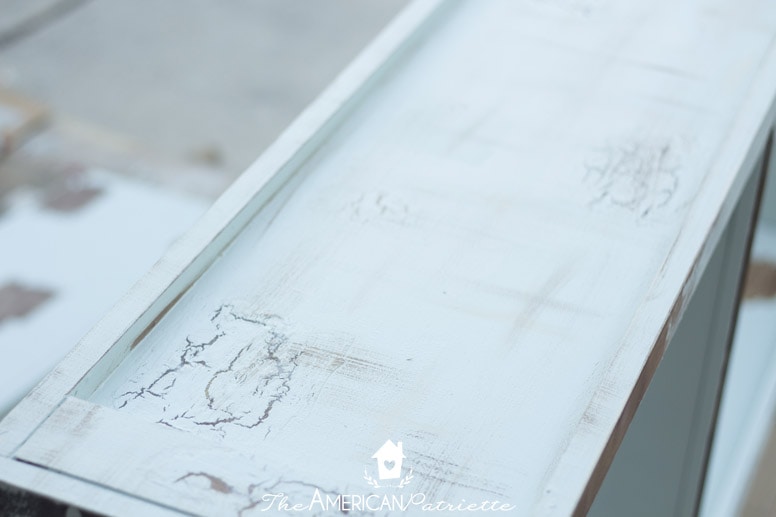
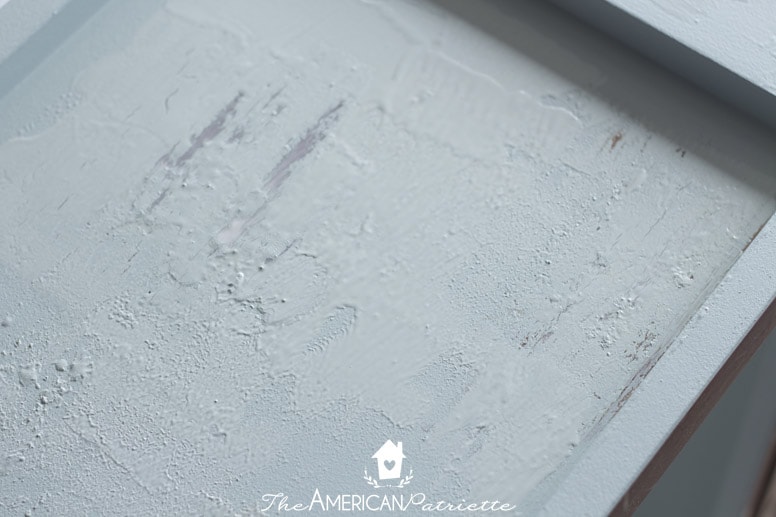
You can tell I painted in some crisscross patterns on there as well. I thought that’d help give it more dimension and add to the vintage look.
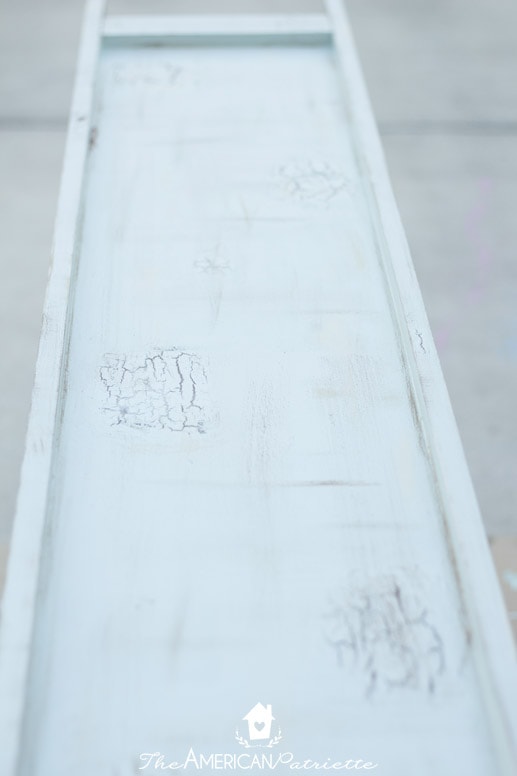
You’ll repeat this process on the entire piece until you’re pleased with the full distressed look.
Once you’ve distressed the whole piece with the dry brush technique, you’re ready to start adding the backing!
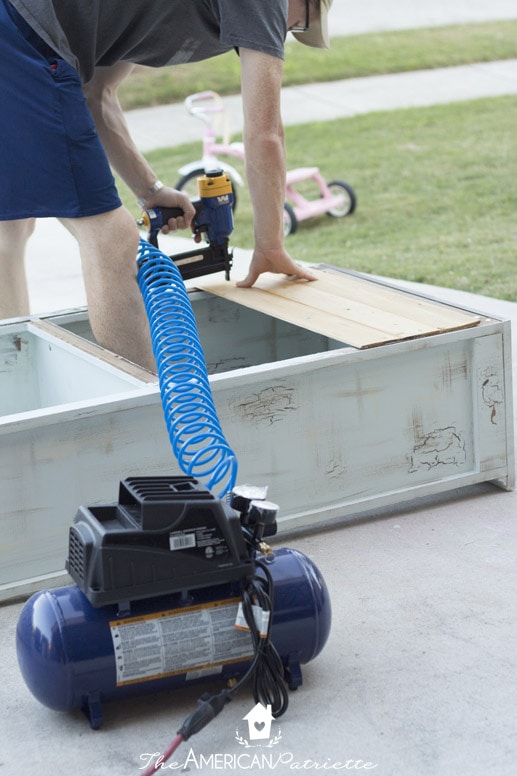
Step 6: Add the backing
I used these wood planks that I had already assembled together from a prior project. After I didn’t end up needing them for that project, I realized they’d be perfect as backing for this.
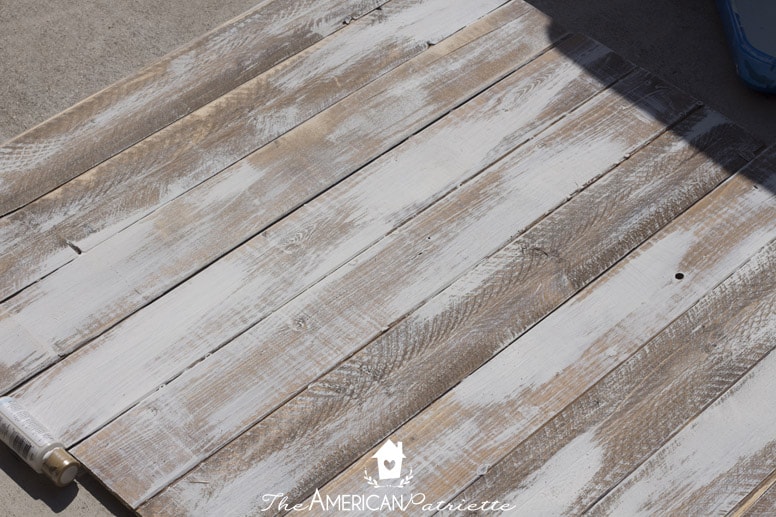
After gluing all the planks together with wood glue (they fit together kind of like a puzzle piece), I stained them with a light wood color. After the stain dried, I went back and dry-brushed these splotches of white all over them, and then used my orbital sander to roughen them up a bit. I love that tool! Seriously, how I redid all this furniture before owning one is beyond me.
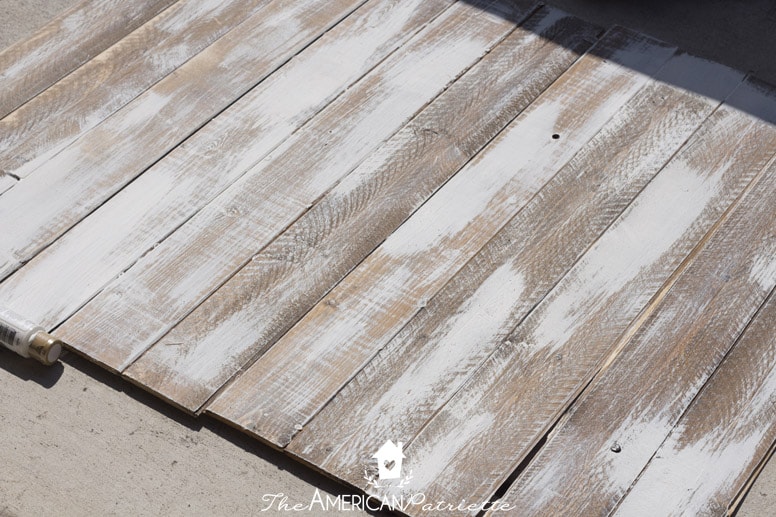
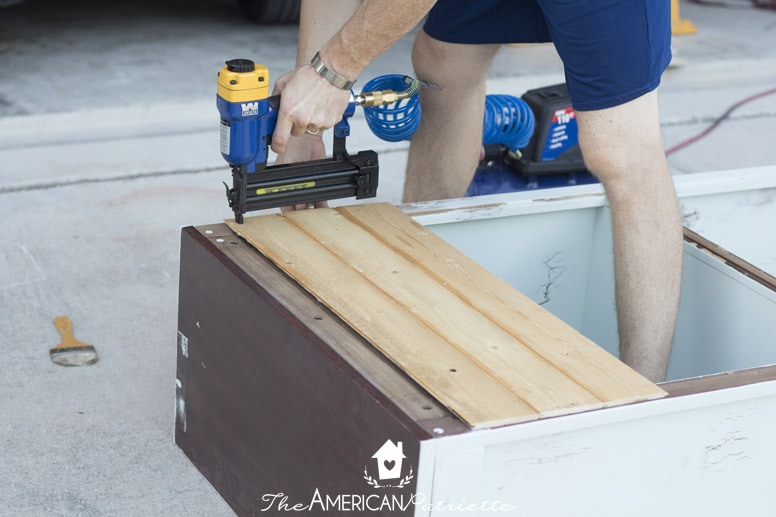
After getting the planks to look the way I wanted them, we measured them to see where we needed to trim them in order for them to fit flush on the back of the bookcase.

Aaron trimmed them quickly with his table saw and then we nailed them to the back of the bookcase with his nail gun. You could probably use liquid nails in this step if you don’t have a nail gun – the wood pieces we used weren’t really heavy, so liquid nails might be a good back-up option.
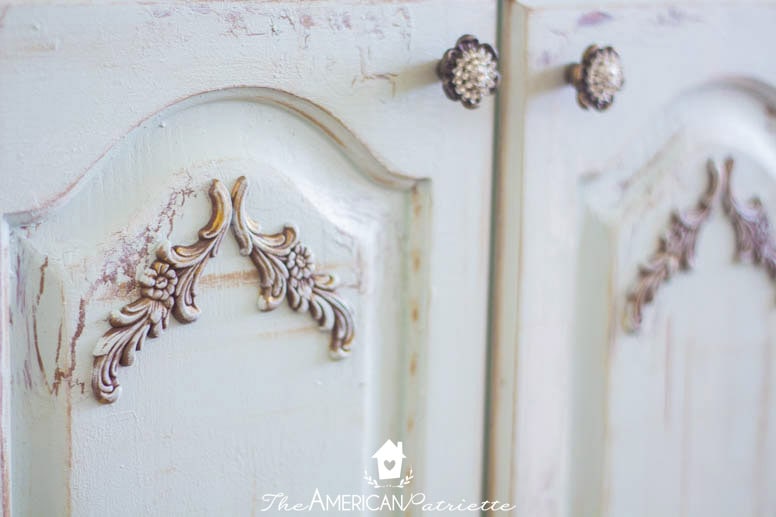
Step 7: Add the flourishes
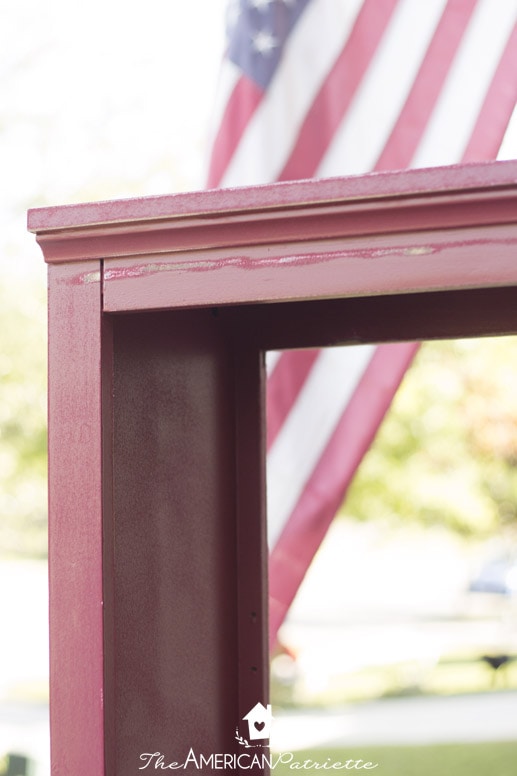
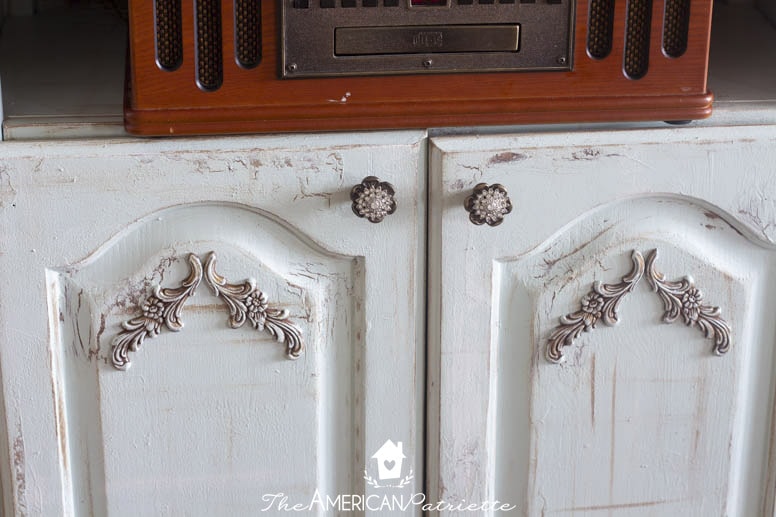
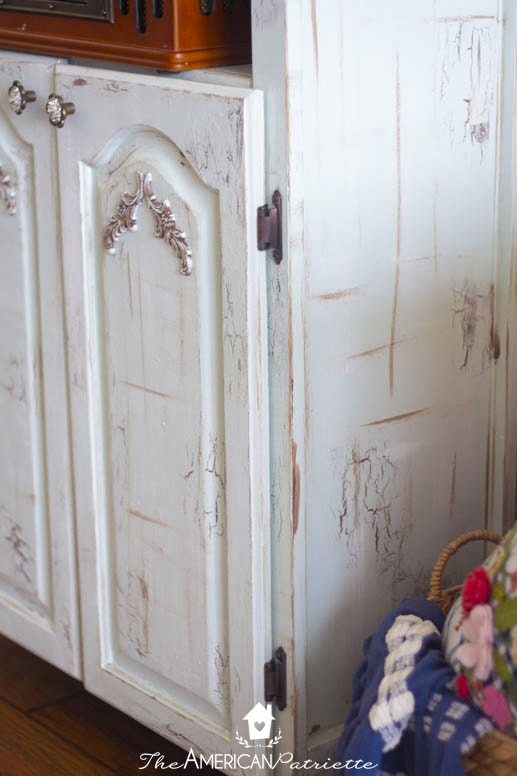
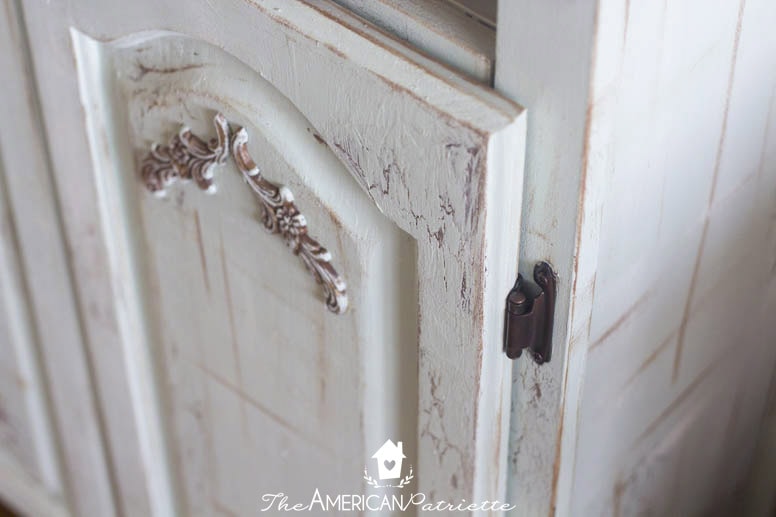
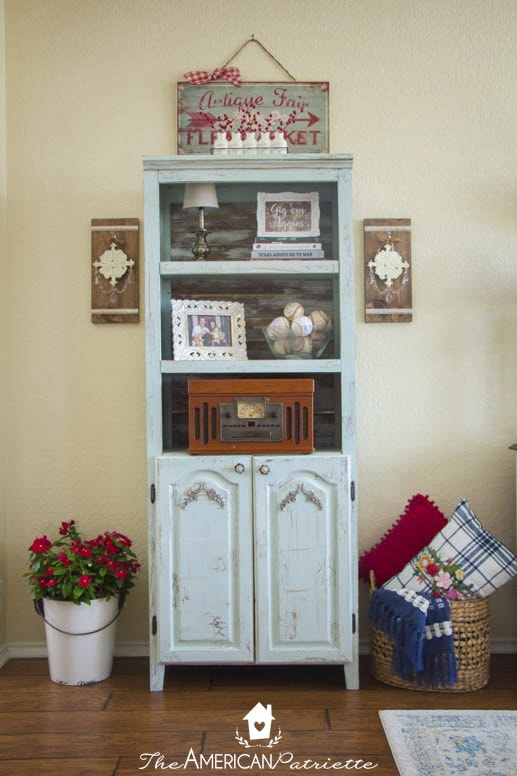
The bookcase is almost finished! Now, just need to add the finishing touches! I absolutely love these wood flourishes from Hobby Lobby – I’ve used them numerous times when refinishing plain furniture. They do so much to dress up a piece!
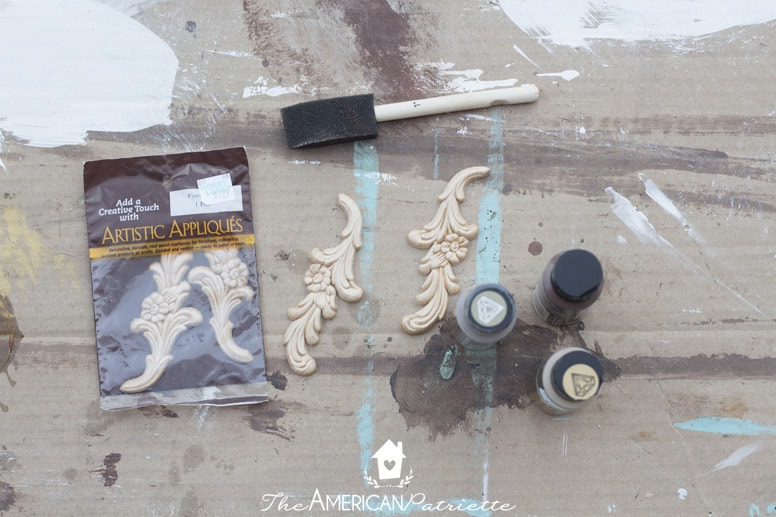
First, I gave them a base coat of brown with the acrylic paint…
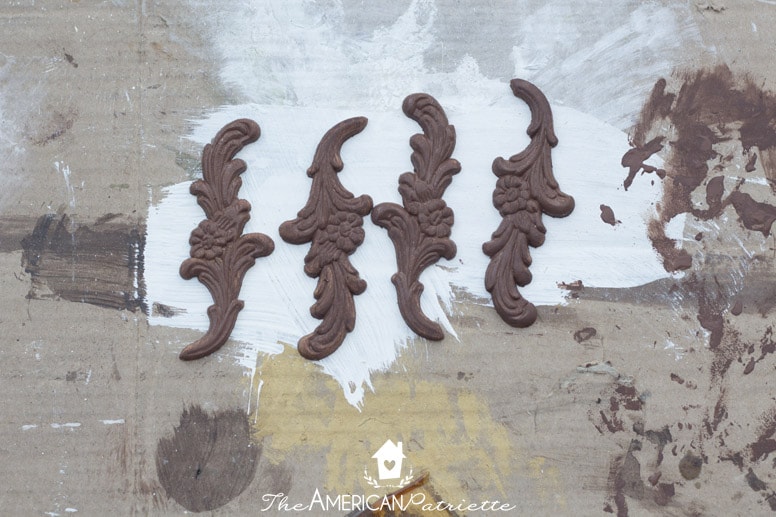
Then I ran some gold over them using that dry brush technique…
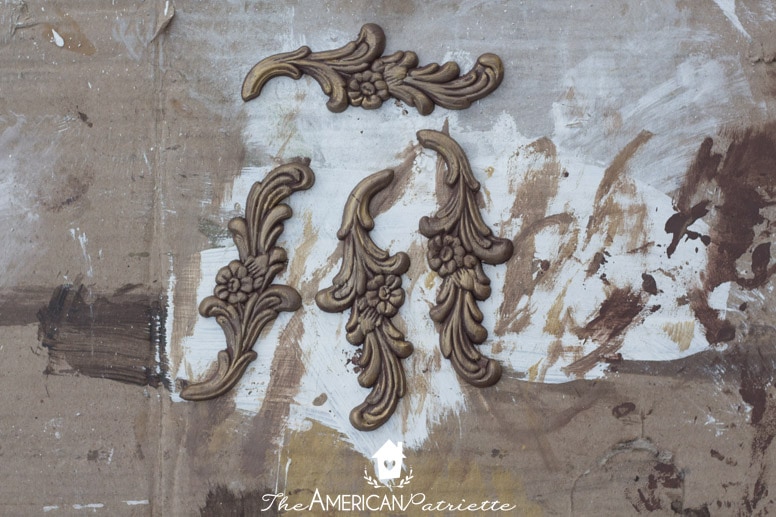
And then I glued them with wood glue to the cabinet doors, and then used the dry brush technique again with the blue paint of the bookshelf. I wanted them to stand out, but I didn’t want them to have such a stark difference, so adding that dry brush blue on there helped blend them into the furniture and make them seem like they’ve been there the whole time!
Don’t they add so much character?! Aren’t you just itching to get started on your piece?!
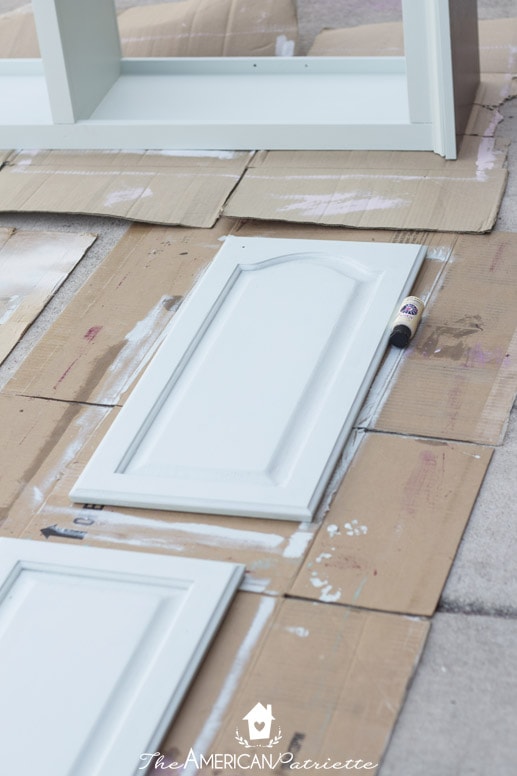
Step 8: Add cabinet knobs and attach the doors to the bookcase (if applicable)
I love using dressy knobs for the furniture I refinish. Just like the wood flourishes, for such a little amount of money, they add so much to each piece! If your furniture calls for some re-assembly, this is the time to do it. Go ahead and put those knobs on, re-attach doors to the frame, and then you’re all done!
Now it’s move-in day! Time to move your piece of furniture in from outside/the garage into your house and show it off!
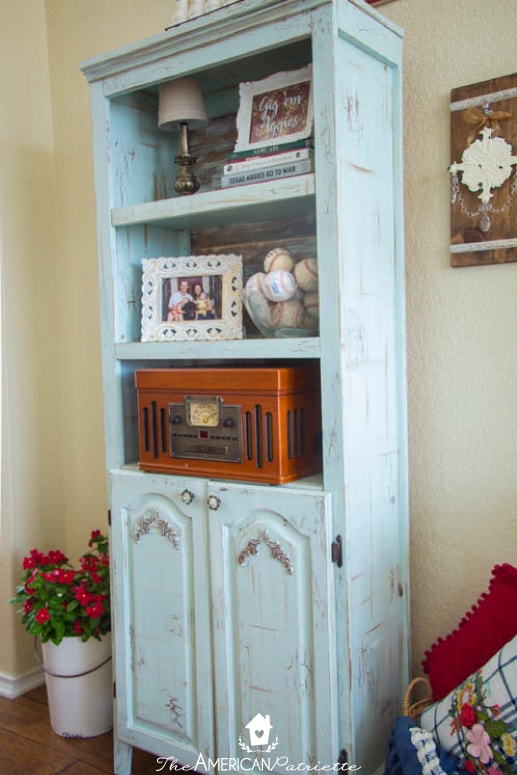
I love that the end result of this process reveals so much detail in the furniture, but that the process itself was SO easy and uncomplicated!
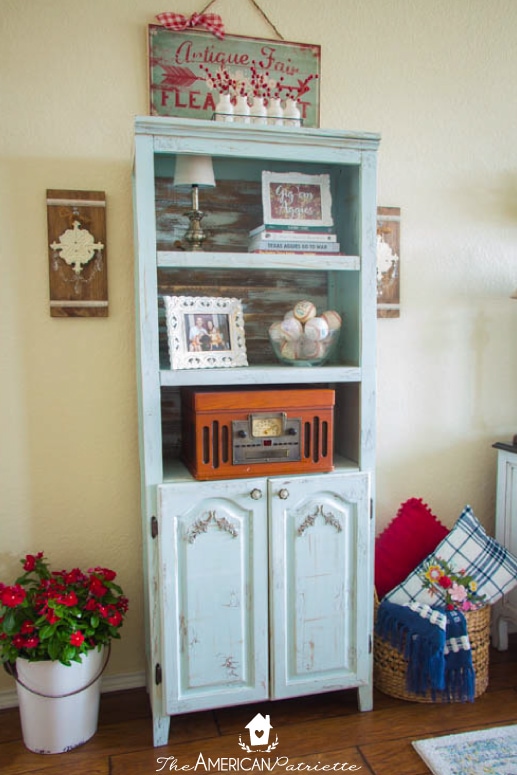
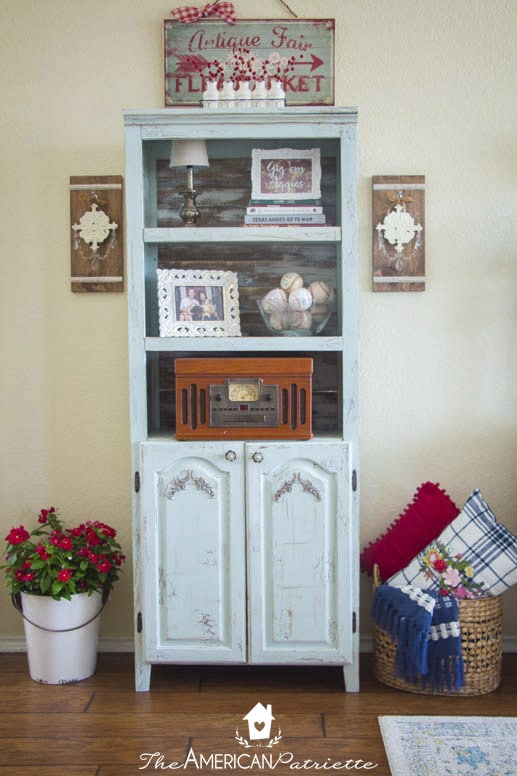
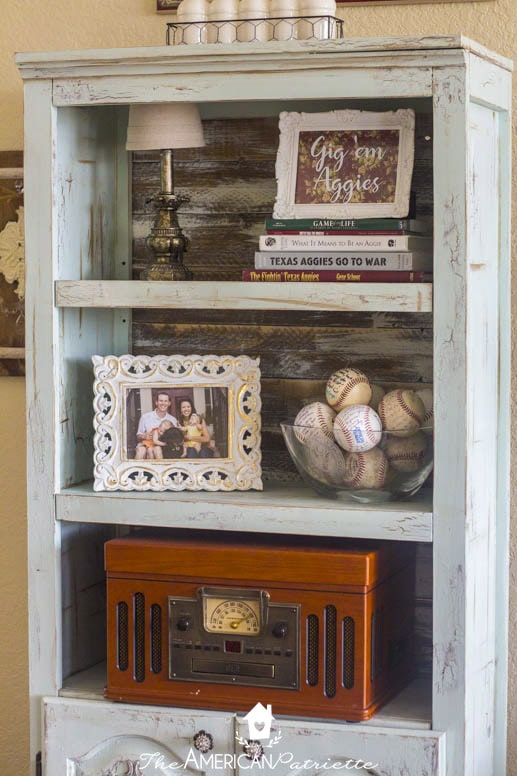
So pretty! And yes, I absolutely love my “vintage” record player (also a CD/Cassette (who uses those anymore?!) player and a radio) – we use it ALL the time. My kids love it, so when we were placing it in our house, we had to make sure we placed it low enough to where they could reach it to turn it on. That thing gets a lot of use in our house!
It is totally not vintage (it’s like 7 years old…it’s not from the 50s!), but I love that it’s got that vintage vibe to it. You can find them for very reasonable prices – I was shocked at how inexpensive ours was. You can go check out some similar styles here if you like the look of ours.
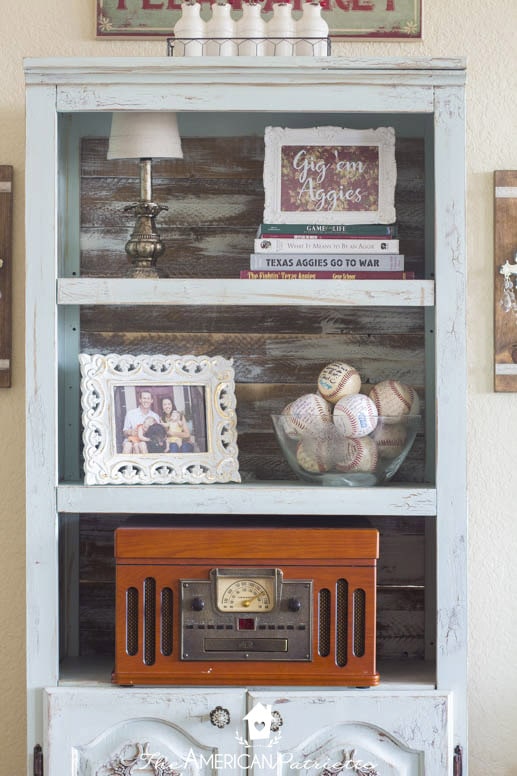
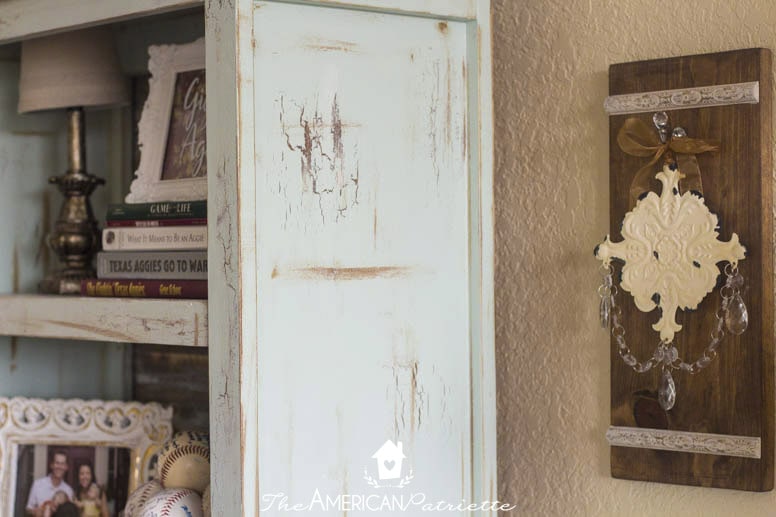
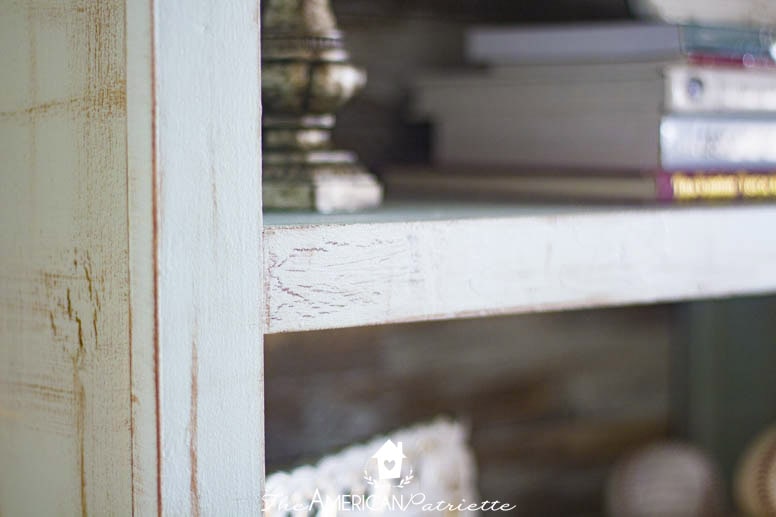
Here are more detail shots so you can see how the finished product really looks:
Love it! Don’t you want to go paint your own now?! Grab your car keys, run to the nearest Goodwill or second hand store, and see what piece of junk you can turn into a total treasure!
Love this idea and want to remember it for later?! Be sure to pin this to your favorite Pinterest board!

What is that shade of blue paint? I’m working on distressing a bookshelf as well, and I’m not sure I chose my favorite paint color!
Ah! I actually have no idea. I wish I did!! I painted this about 5 years ago, so I don’t have the paint can anymore. It’s a very light minty shade of blue.
How is the original paint job holding up considering that you didn’t use primer? This is the coolest technique! Thank you for sharing!
Yes! Looks just as good today as the day I painted it…which has been about 5 years now!
What finish did you use for your base color? Flat, eggshell, satin…? Etc
I think it was probably flat or eggshell. I’m not sure you’d get the same crackle effect with satin or semigloss. You might! But my bookcase really doesn’t have any sheen to it, so my guess is I probably used flat!
I have 2 questions about the crackle technique. If the color of the laminate base is what I want to show through, can I simply put the Elmer’s glue directly on it to get the same effect, or do I need to have an acrylic paint there to cause some kind of repelling action?
Also, is it necessary to use paint on a roller for the outer coat? I have several cans of latex spray paint that I want for the main color of my peice.
I think you’d be fine without any acrylic paint – it’s not necessary for a reaction with the glue. And spray paint might work! I’ve never tried it, but I know for sure that BRUSHING the paint on doesn’t work. But spraying it on might, as long as it’s latex paint.
I just did this technique on some melamine floating shelves I am hanging in my art studio and so far it looks fantastic. I am currently in the process of letting the enamel paint that went over the glue dry but so far it is really crackling quite well. I am so stinking excited. Thank you so much for this technique!
By the way, I used white chalk paint for my main color and copper, rose gold, and silver metallic acrylic paints for the crackle colors. I plan on using the rose gold (which is basically a lighter shade of the copper) for the dry brushing.
Yay, glad it looks so good & worked out well!
The glue didn’t crack. Here’s what I did, after allowing the enamel paint to fully dry, I applied a liberal amount of Elmer’s multi-purpose Glue-All (Interior); let is sit until tacky, then painted over it with a sponge roller. It’s been 12 hours and no cracking yet. The area that was supposed to crack is smooth except a little raised due to the glue patches.
Can you tell me what I did wrong?
Using enamel paint? I always use acrylic!
This is so amazing. I’m working on distressing a laminate dresser and will definitely be using some of your tips. This was a fantastic idea. The bookcase looks fabulous.
Yay! I hope it works out well for you! 🙂 I absolutely love this technique!!