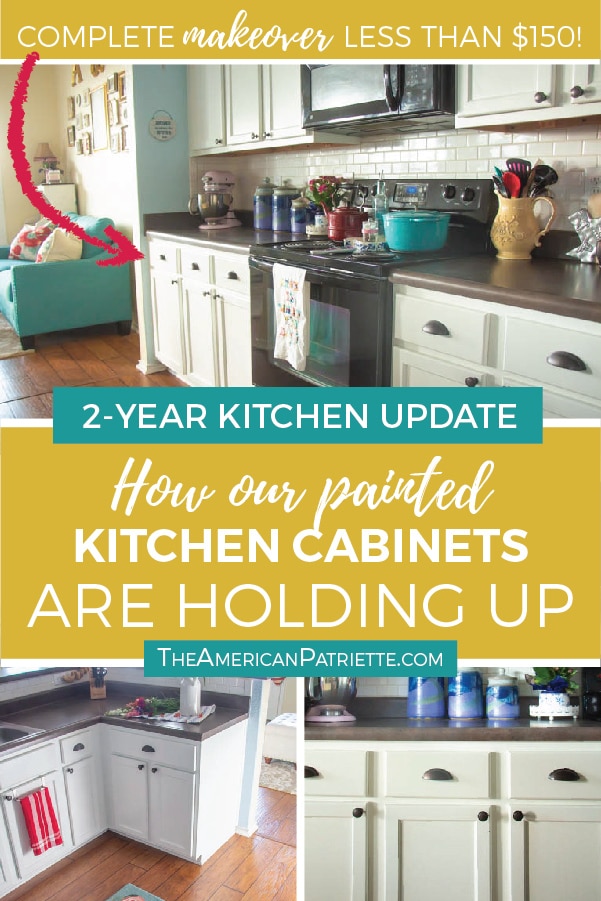
Update on our DIY White Painted Kitchen Cabinets – How are they holding up 2 years later?
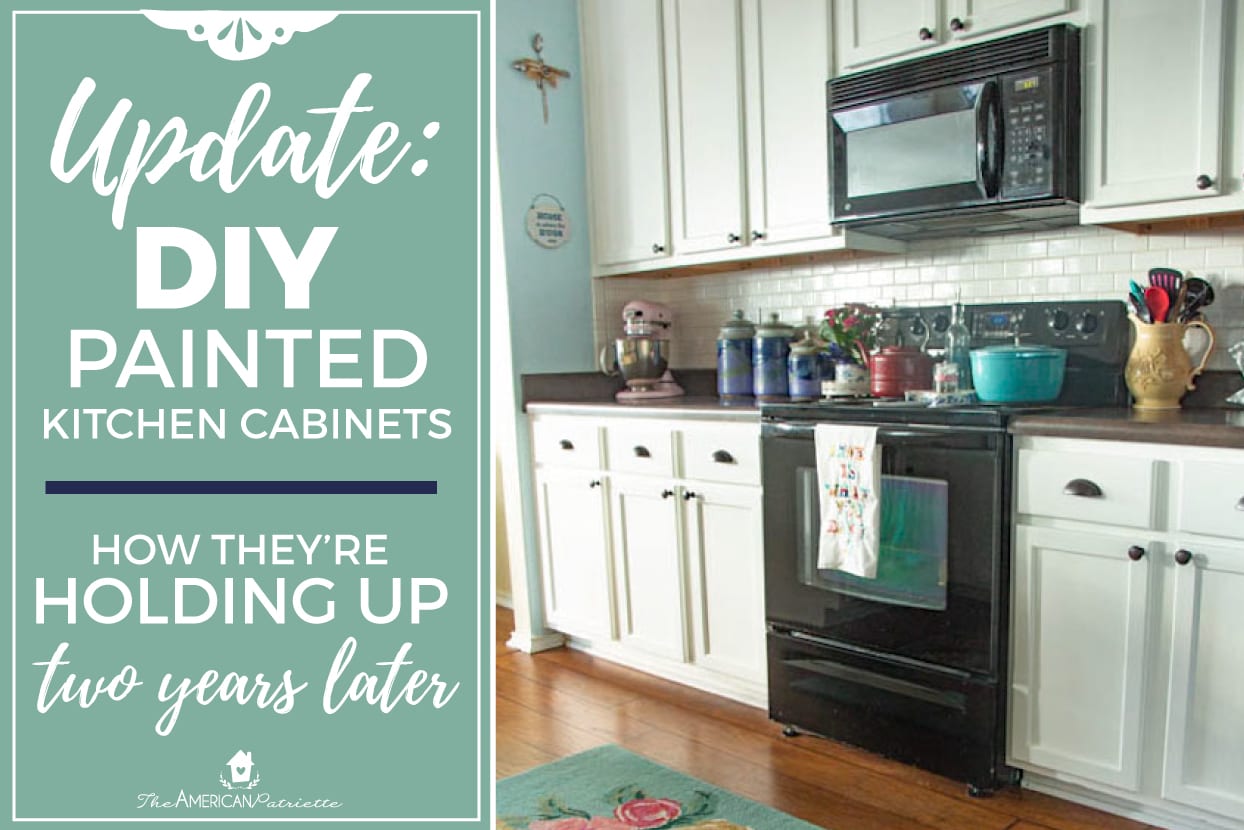
Hi friends! It’s now been two years since we did a complete budget-friendly makeover on our kitchen cabinets, and I wanted to give an update on how they’re holding up now that they’ve experienced quite a bit of life in there!
As I mentioned in my step-by-step tutorial on how to paint kitchen cabinets, when we moved into our builder-grade house, almost eeeeeverything was some shade of brown or tan. I just cannot handle my house without color (anyone else?) – I spend way too much time here not to enjoy it. Right?! However, considering we bought a budget-friendly house because we were…well, on a budget…all of our updates also had to be budget-friendly.
I know I’m not the only one.
I was bound and determined to figure out a way to bring some life, color, and updates to our kitchen without spending an arm and a leg, and one of the first updates I wanted to make was to our kitchen by painting our cabinets. So, we got to work researching like crazy, chased about a million rabbit trails, and finally made up our minds on how we were going to proceed, and we were able to do a complete overhaul on our cabinets for about $150. YEP. Only $150 (including new knobs & pulls for the cabinets and drawers)!
After enough reading, we were pretty sure the process we settled on would hold up well, but now that it’s been two years – two years full of a lot of cooking, cleaning, dishes, and well, just life going on in this kitchen, I am THRILLED to report how well they’ve held up, so I want to take you for a little tour, show you how they’ve held up, and share some honest thoughts with you about the process we used.
Before & After $150 Kitchen Cabinet Transformation
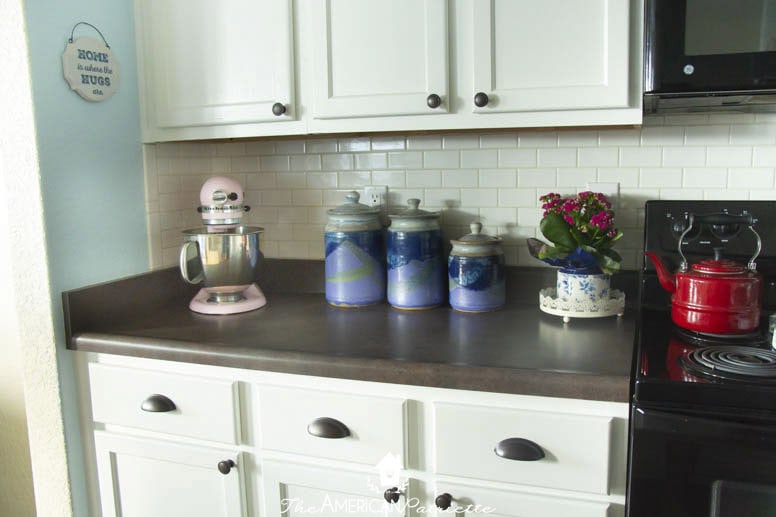
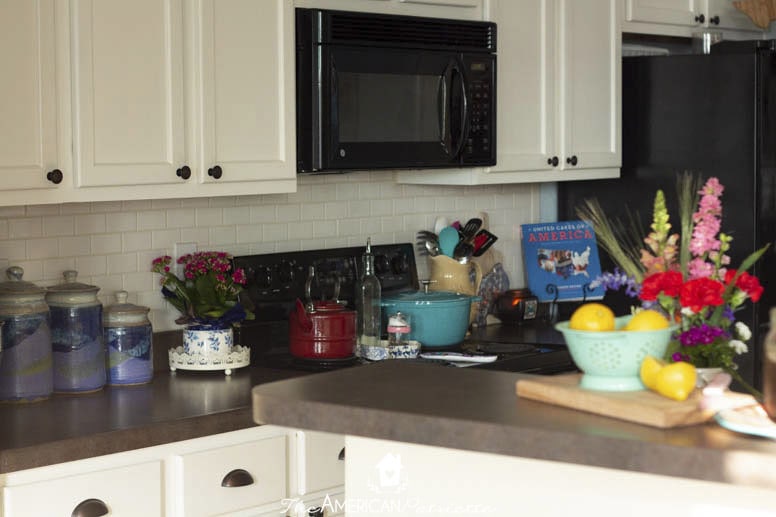
First, let’s get started with a look at how our cabinets looked before we painted them the transformation after painting them white:
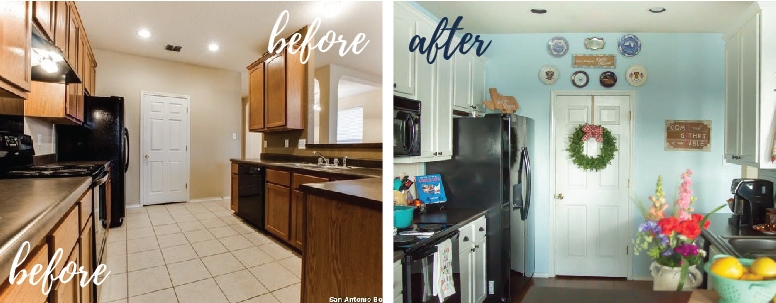
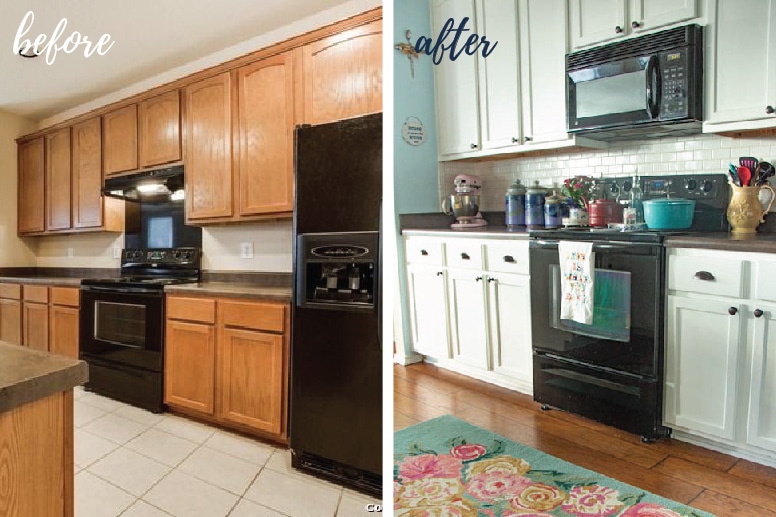
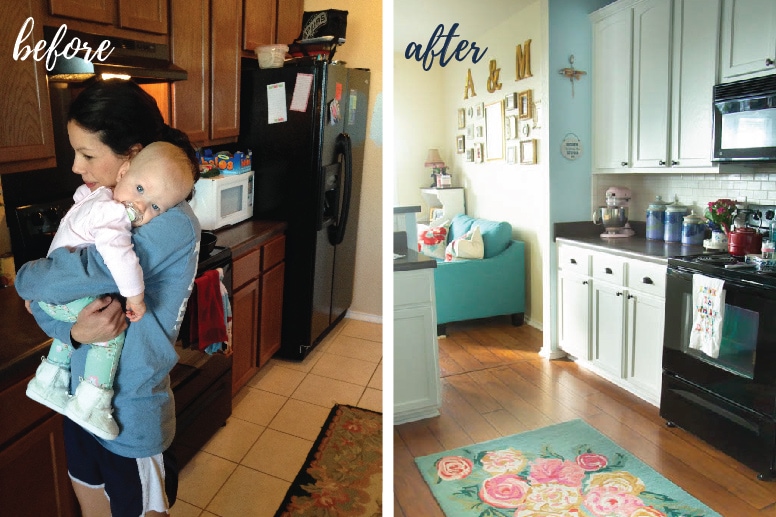
I KNOW! Huge transformation! So much brighter, more colorful, and welcoming. My kitchen is truly a happy place.
(Side note: When we painted our cabinets, I never thought about sharing it in a blog post some day, so I didn’t bother taking before and after pictures. The first two “before” pictures are from the San Antonio Board of Realtors when our house was on the market before we bought it, and the last picture was just a picture I found in my phone from a few years ago and I had a pretty good view of the cabinets in the background. I had no idea I’d love these cabinets so much, so I never even thought to write about them and thus make sure to take before pictures! Face palm.)
The Transformation: How We Painted Them
Like I mentioned above, Aaron and I did a ton of research on how we wanted to paint our cabinets. We knew it’d be a fairly large project, and though we needed to do the project on a pretty slim budget, we also wanted to make sure and do it right. Somehow, we needed to figure out how to skimp on cost but not on quality – not always an easy undertaking!
After reading about a zillion posts from other bloggers, we ultimately settled on sanding them down, priming them with Zinsser 1-2-3 Bulls Eye Primer (something sooo many home/DIY bloggers recommended, and now it’s my go-to primer for any DIY furniture makeover that needs priming), and painting them with Benjamin Moore Advance Paint. I constantly kept reading about how well this paint works on cabinets – that it was extremely durable, easy to clean, had great coverage, and that it was essentially self-leveling (i.e. it would look like a smooth, natural finish where you could still see the wood grain – it would essentially mimic the same finish you’d get from a paint sprayer at a fraction of the cost). We definitely found that to be the case with our cabinets – I swear by that stuff now!
Because I know how much time we spent researching and deciding on the exact steps we’d take to paint our cabinets, and because we’re so thrilled with the results (even after 2 years of use and wear), I wrote up a thorough step-by-step tutorial on exactly how we painted our cabinets, just so you can replicate our results in case you’re wanting to do something similar in your own kitchen. If you haven’t already, you can go here to learn exactly how we accomplished our $150 cabinet transformation, including the tools we used, more on the primer/paint we used, and the steps we followed to get them looking like high quality painted cabinets for a low cost.
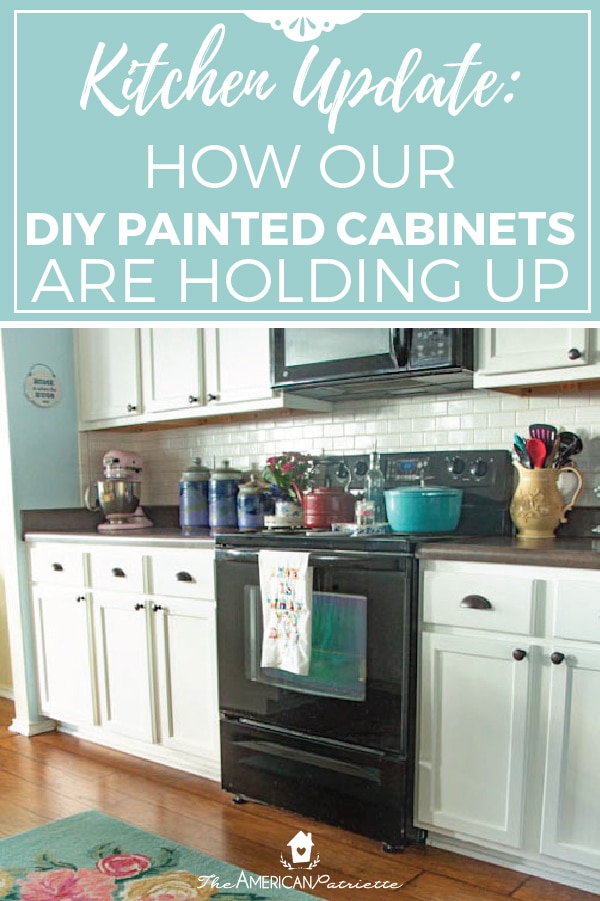
Update on the DIY White Paint Job: 2 Years Later
So, how much wear and tear do we have going on with our kitchen cabinets after 2 years of use? Let’s have a little Q&A, because these are the questions I’d have if I were trying to decide whether or not this is a good process to consider for painting my cabinets!
1. Have you noticed any chipping, peeling, or scratches in the paint?
Hardly.
It’s like a miracle, because we spend A LOT of time in this kitchen. I have two tiny kids who climb in and out of cabinets, a 60lb dog who has learned how distracted we can get by taking care of our two kids and thus thinks he can get away with jumping up on the kitchen counters to help himself to some food that might be lingering about, I cook and bake often and am not neat and tidy when I cook (think: my kitchen is my laboratory of experiments), and we frequently have people over.
We’re just asking for it.
But no, we have hardly any scratches or chips, and the ones we do have are easily touched up with a dab of paint. Remember that self-leveling I talked about in the paint? 🙂
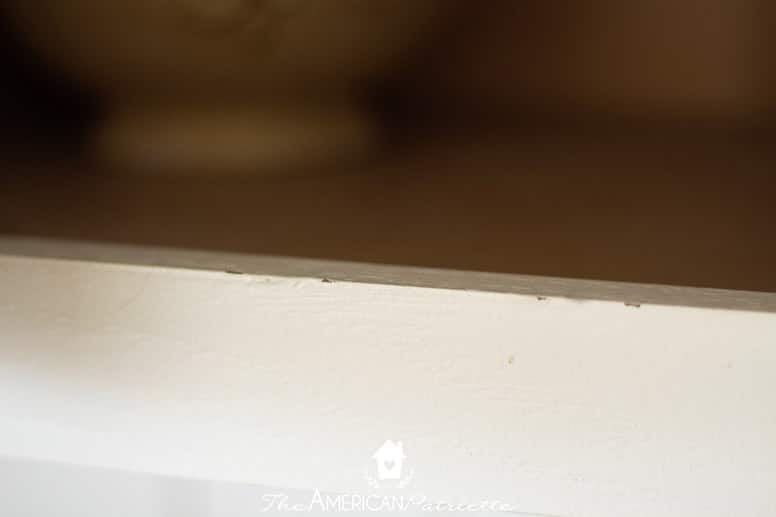
I took pictures of some of the “wear and tear” on the cabinets, so you can see for yourself:
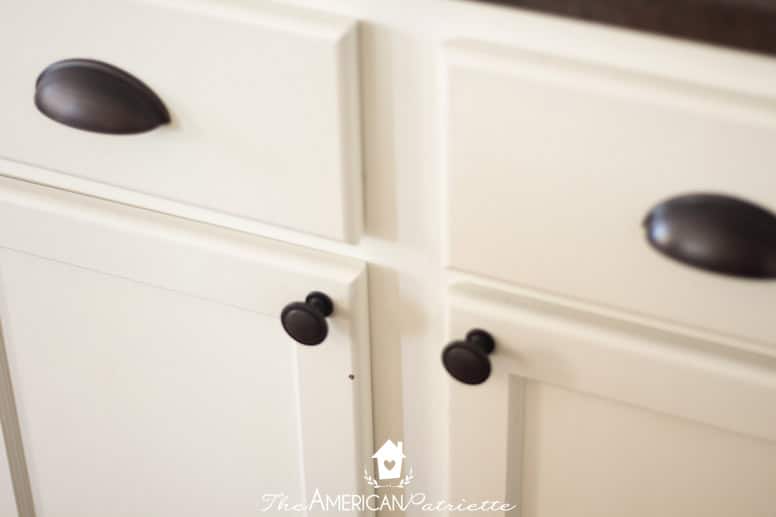
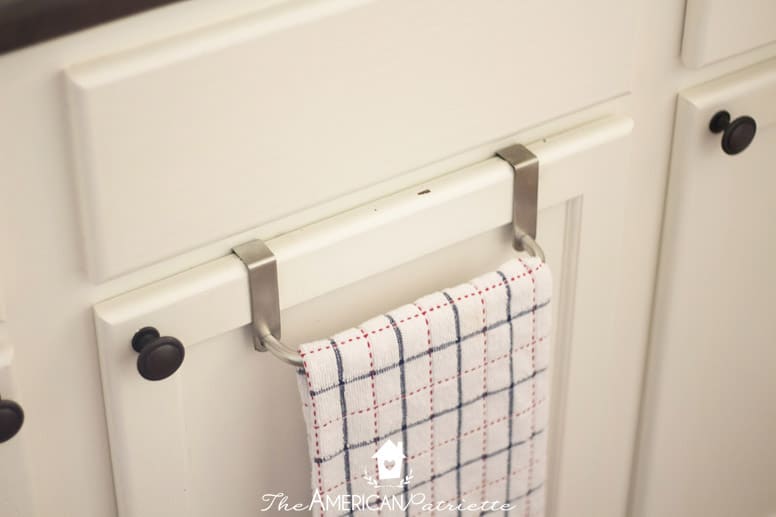
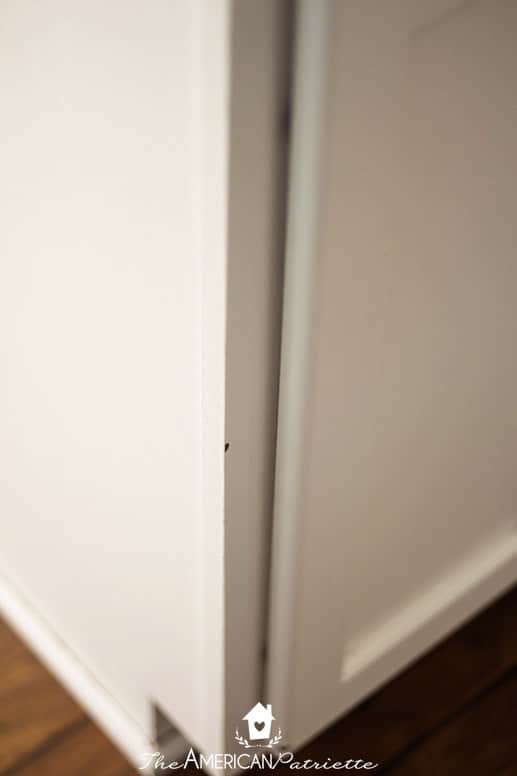
See a chip on each photo? That’s about it.
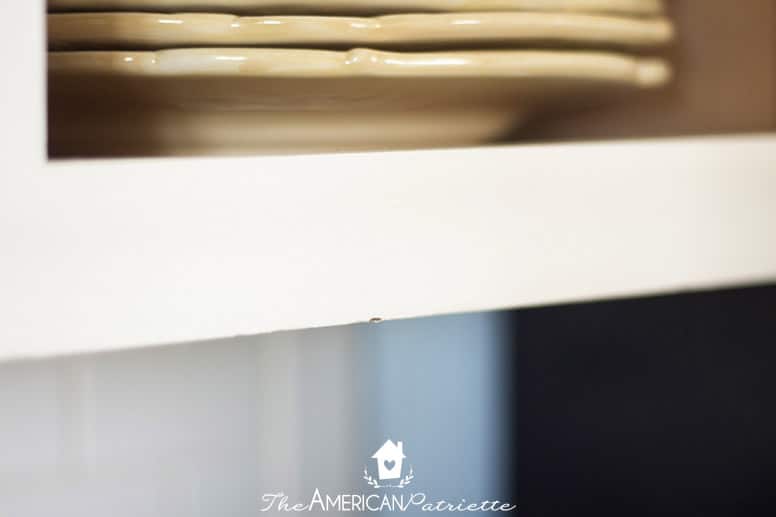
We have 6 upper cabinets (11 doors – we have one cabinet that isn’t very wide and just has one door), and in one of the cabinets, you can see some slight wear just there on the inside:
No other wear on any of the insides of the other upper cabinets, and just some really minor wear on the inside of some of the lower cabinets. Pretty awesome!
2. You chose to paint your cabinets white even though you have young kids who have sticky fingers and make messes. Are you crazy?! Are they at least easy to clean?
Yes.
Yes, I am a little crazy (but not really for painting my cabinets white – just in general), and yes, these cabinets are super easy to clean.
I really now know why people so highly recommend Benjamin Moore Advance paint. We used the satin finish, so not even the semi-gloss or gloss, and these cabinets are extremely easy to wipe down with just a wet rag. I really don’t notice them getting very dirty, but if we spill something (remember, I’m not neat and tidy when I cook and bake), they’re really easy to clean, and if we notice some stains that accumulated from a spill that happened a while back, again, it’s really easy to wipe ’em down with a soapy rag.
3. Have you noticed and fading or yellowing in the white paint?
Nope.
It still looks awesome and bright, fresh white!
4. Would you do this project the same way all over again?
Yep! I really have been so pleased with how they turned out. Again, we really wanted that quality finish on a budget, and I think using that primer, paint, and foam rollers really helped to accomplish that. I will say that, because I’m an avid DIYer, quite curious, and a natural experimenter, I’d certainly consider trying a different painting method for cabinets if we decided to paint the ones in either of our bathrooms, but, because I now KNOW that this process works and still looks good even after use, I’d definitely do it again, and I’d absolutely recommend this same method to others.

That’s it, friends! I’ll give y’all another update in another couple of years to see if this paint is really standing the test of time, but for now, it definitely gets an A from me, and I’m a tough grader when it comes to DIY projects. 😉
If you’re wanting to repaint your kitchen cabinets and want to follow our exact process for how we painted ours, head over here to Part 1 of my series of how we did this $150 overhaul!
Want to remember this for later? Be sure to save it to your favorite Pinterest Board!
I can’t wait to try this!! Where did you get your kitchen canisters? I love those!
I hope it works for you! My neighbor just followed my tutorial and now has white kitchen cabinets, too! 🙂 And my canisters are from my mom – she got them decades ago and saved them for me for when I grew up and got a house of my own. Super nostalgic!
Did you use a topcoat?
Or did you find you didn’t need to?
Thanks
Hi Jennifer, that’s one of the reasons we used this paint – no need for a top coat! It’s a very durable paint and it has a great finish. No streaks or anything!!